Inspect
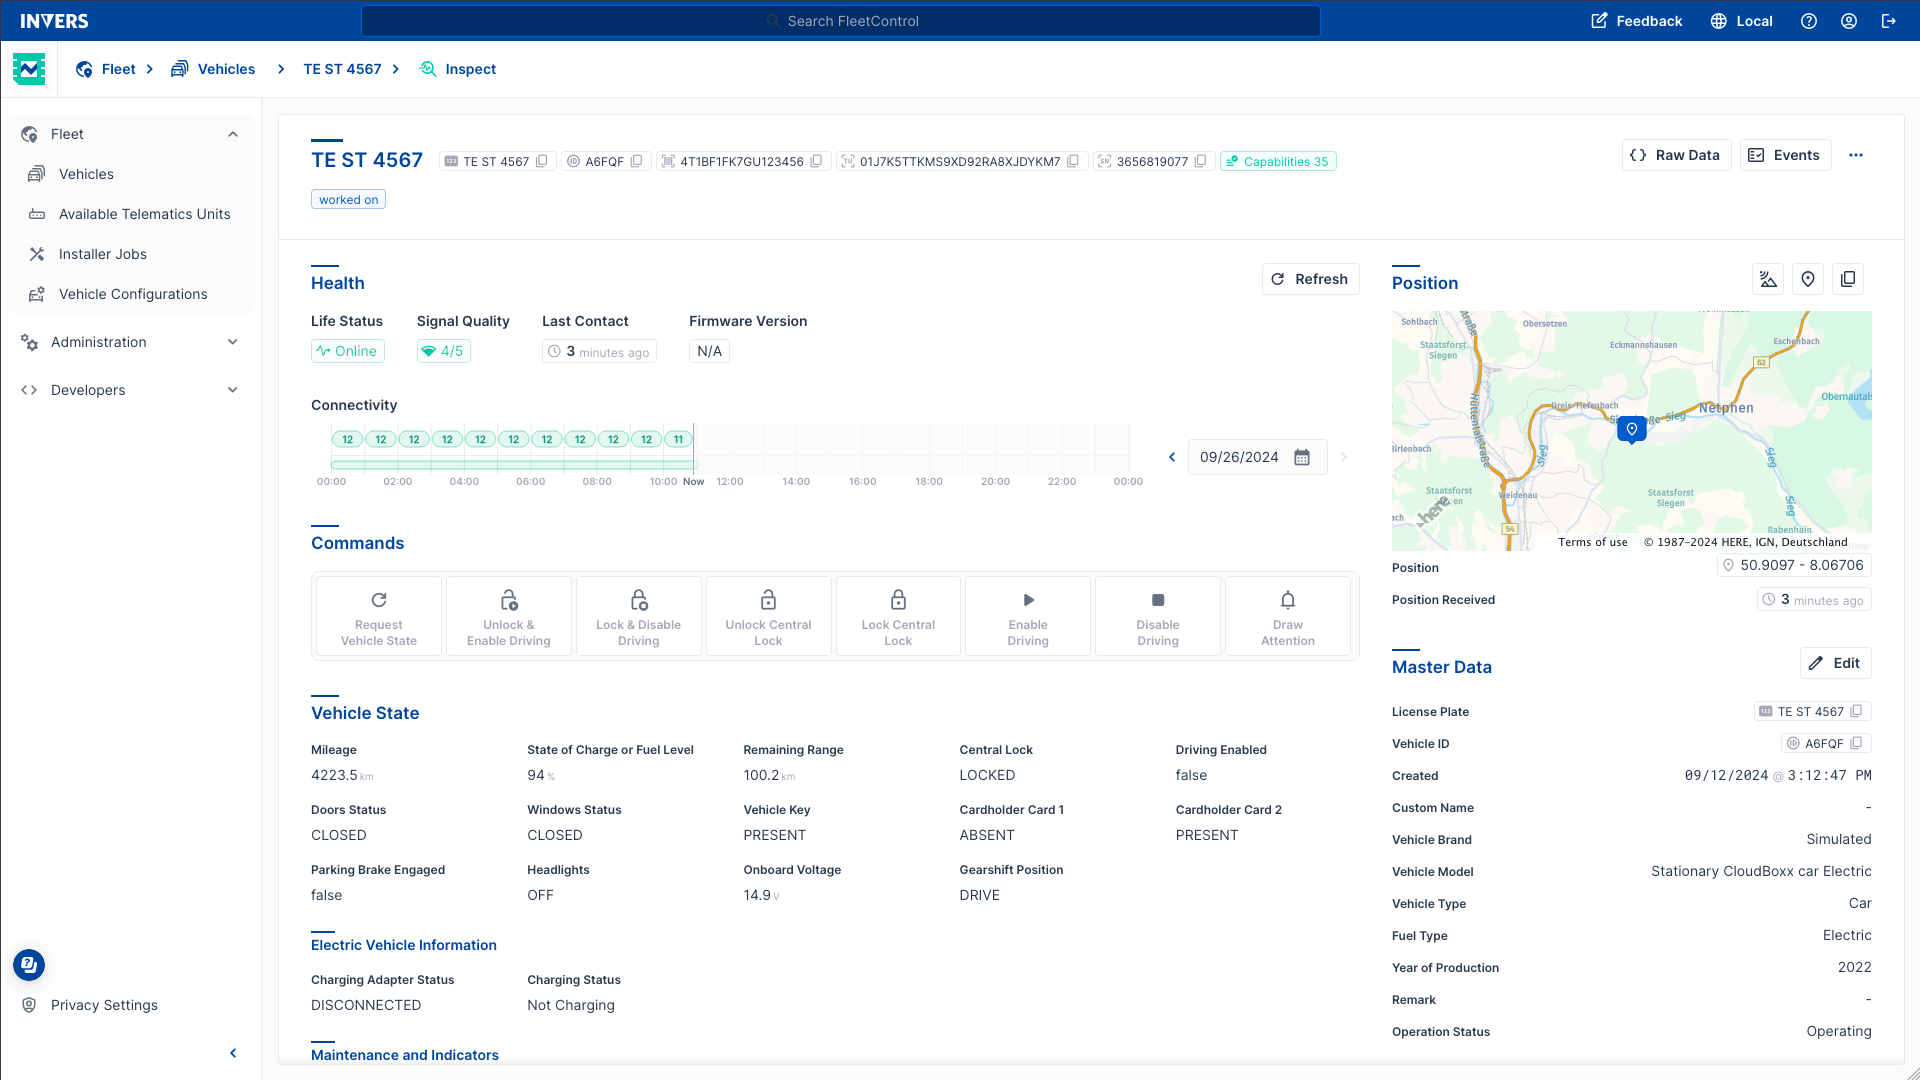
The Inspect page gives you a detailed overview of your vehicles’ status and health. It enables you to remotely control the vehicle, for example, by locking or unlocking the central lock or enable or disable driving.
Accessing the Inspect Page⚓︎
To get started, click on Vehicles, search for a vehicle in the Global Search Bar, and click on the result:
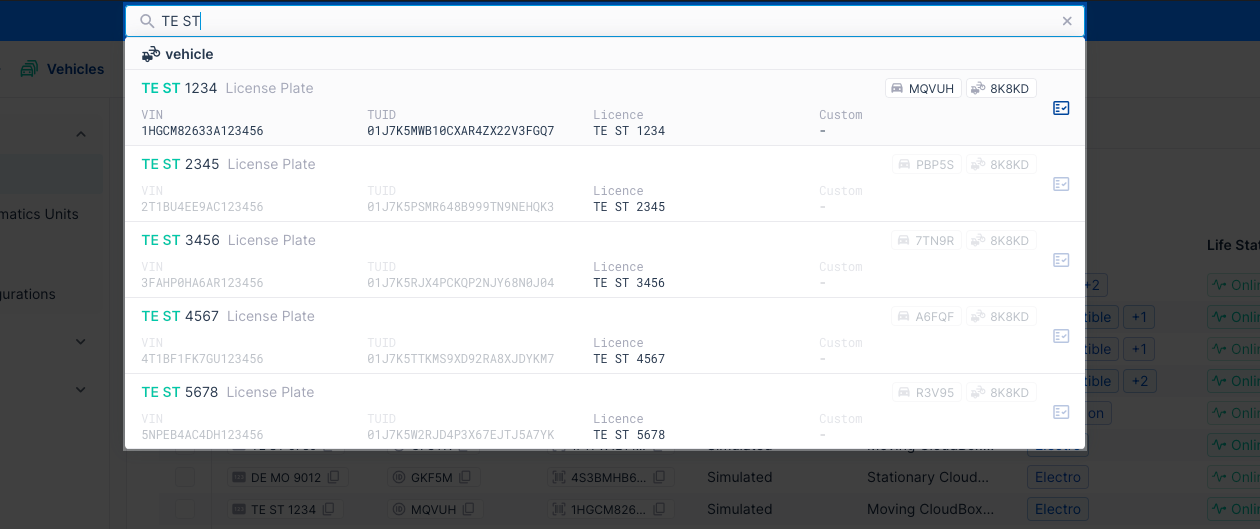
Alternatively, you can choose a vehicle in the table and click Show Inspect. Here, you’ll find everything about your vehicle, like the brand, model, license plate, VIN, and position. It’s your one-stop shop for a clear and detailed overview of your vehicle’s status.
For a better overview, we’ve divided the page into three main sections:
Header⚓︎
The header is where you’ll find key information displayed as tags. These tags are super handy and appear in several places in FleetControl.
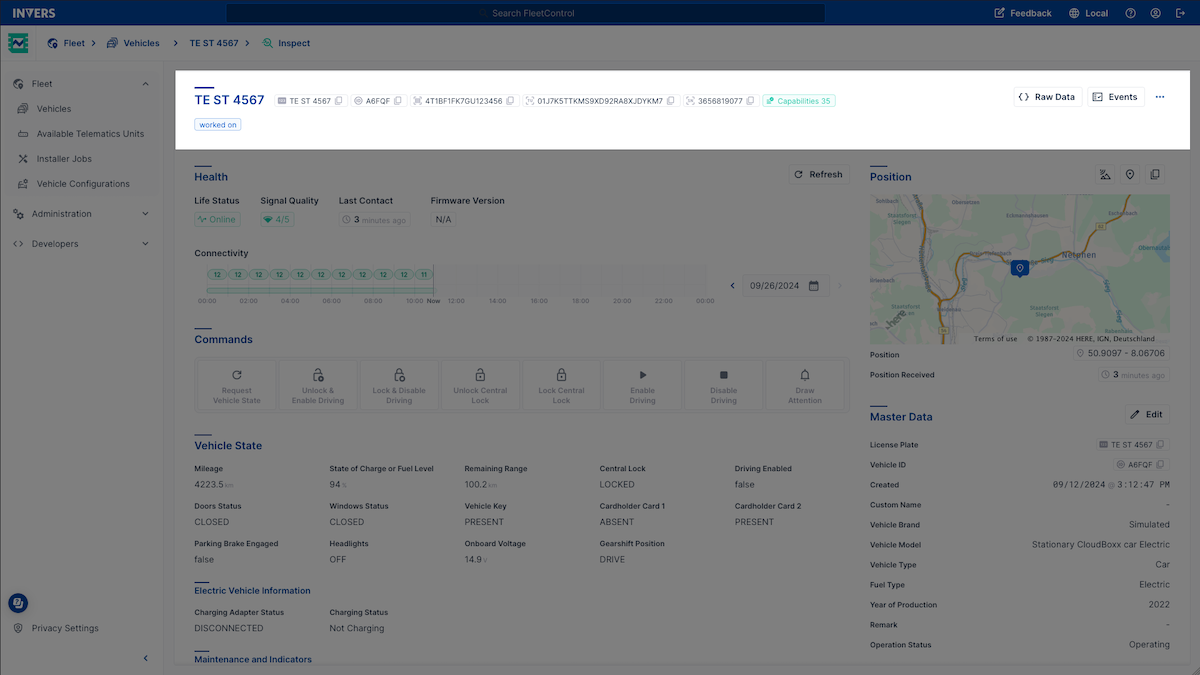
- Copyable Tags: Important details like the license plate, VIN, vehicle ID, and telematics unit ID can be copied quickly using the built-in copy button. This makes it easy to use these values in other programs.
- Detailed Tags: Tags like Capabilities open a dialog with more detailed information.
- Custom Tags: You can customize tags to label vehicles with your keywords and topics, allowing you to group and filter fleet units.
On the right side of the header, you’ll find several buttons:
- Raw Data: View vehicle data and state data in JSON format, perfect for developers.
- Events: Open the Events page.
- More Actions: Access additional actions.
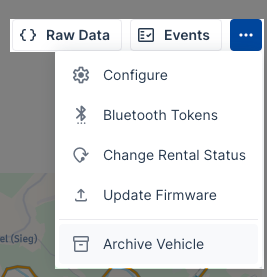
- Configure: Configure the telematics unit and accessories, or edit feature configurations for tracking, damage detection, smoke detection, driving events, parking events, or auto immobilizer.
- Bluetooth Tokens: Manage Bluetooth tokens for vehicle access.
- Change Rental Status: Set the vehicle’s status to “in rental” or “not in rental” (available only for OneAPI fleets).
- Update Firmware: Update the firmware of the CloudBoxx and the Bluetooth module of the vehicle.
- Archive Vehicle: Archive the vehicle. It will still be searchable for up to 90 days. During this period, you can view the data recorded up to the point of archiving. After 90 days, the vehicle will be permanently removed from the inventory.
Main Content Area⚓︎
This is where you get a comprehensive view of your vehicle’s health and can execute commands.
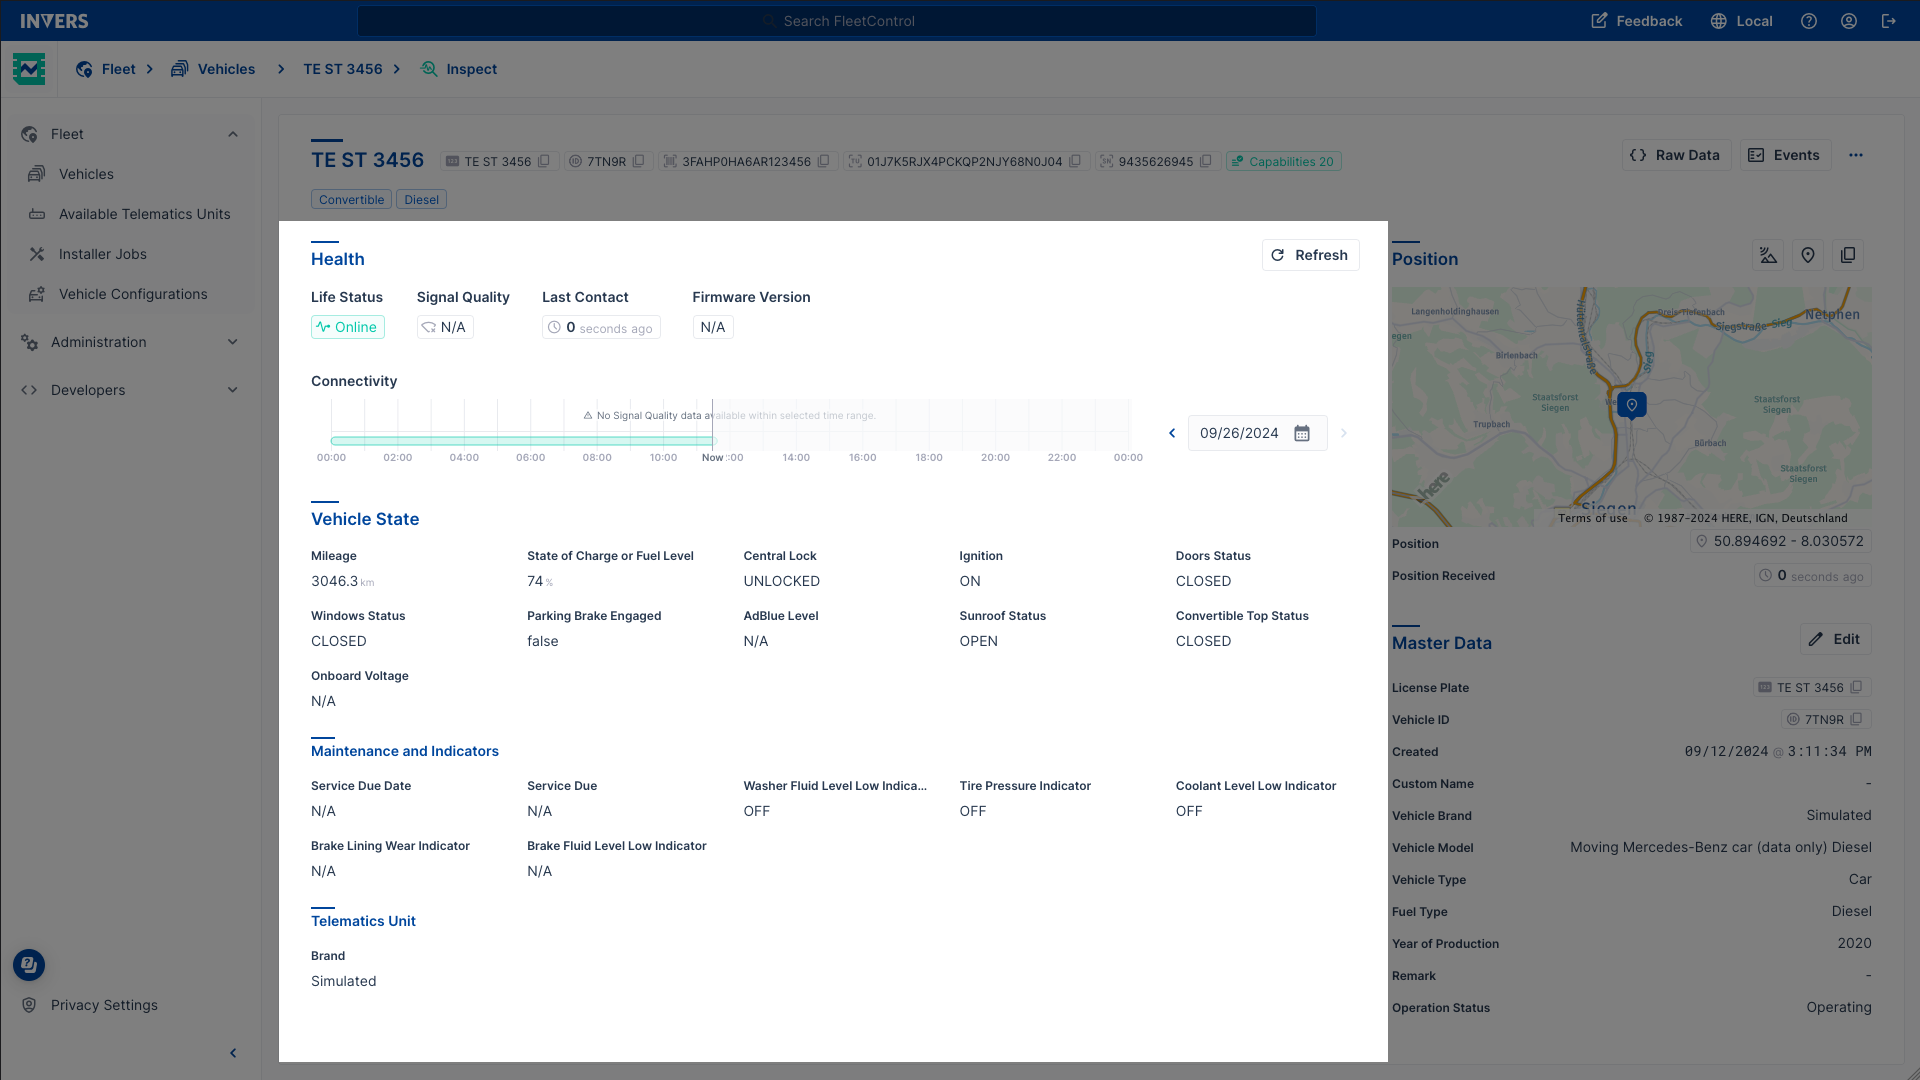
Health⚓︎
Get a quick overview of your vehicle’s health with indicators like Life Status, Signal Quality, and Last Contact. The Connectivity bar keeps you informed, and the date picker lets you scroll through the last few days quickly.
Commands⚓︎
In the main content area, you can execute commands to remotely control your fleet. Send vehicle commands like unlocking the immobilizer or resetting the modem. Command capabilities vary by vehicle model and telematics unit, as shown in the Capabilities tag in the header.
Generic Command Capabilities:
| Command | Description |
|---|---|
| Request Vehicle State | Actively request the current state of the vehicle. |
| Enable Driving / Unlock Immobilizer | Disable the immobilizer of the vehicle and enable the driver to start the vehicle’s engine. |
| Disable Driving / Lock Immobilizer | Disable starting and driving the vehicle. |
| Unlock Central Lock | Unlock the vehicle. |
| Lock Central Lock | Lock the vehicle. |
| Unlock & Enable Driving / Unlock Immobilizer | Unlock the vehicle and enable starting and driving. |
| Lock & Disable Driving / Lock Immobilizer | Lock the vehicle and disable starting and driving. |
| Draw Attention | Draw attention to the vehicle. |
The following command capabilities are CloudBoxx-specific:
| Command | Description |
|---|---|
| Switch Mobile Network | Instruct the CloudBoxx in the vehicle to switch to another mobile network. |
| Reset Board | Restart the telematics unit of the vehicle. |
| Reset BLE | Restart the Bluetooth module of the CloudBoxx in the vehicle. |
| Restart Modem | Restart the modem of the CloudBoxx in the vehicle. |
| Reset Data Connection | Restart the data connection of the CloudBoxx |
| Switch Network | Disconnect the SIM in the vehicle from the current network. It will connect to a different network upon reconnecting, if one is available. |
| Request SIM Resumption | Notify the connectivity provider to reactivate the suspended SIM in the vehicle. |
| Request SIM Suspension | Notify the connectivity provider to suspend the activated SIM in the vehicle. |
Status Data⚓︎
We’ve divided the vehicle status data into clear and concise information blocks that present the data in a logically coherent manner. This gives you a quick overview of the essential vehicle information.
Side Panel⚓︎
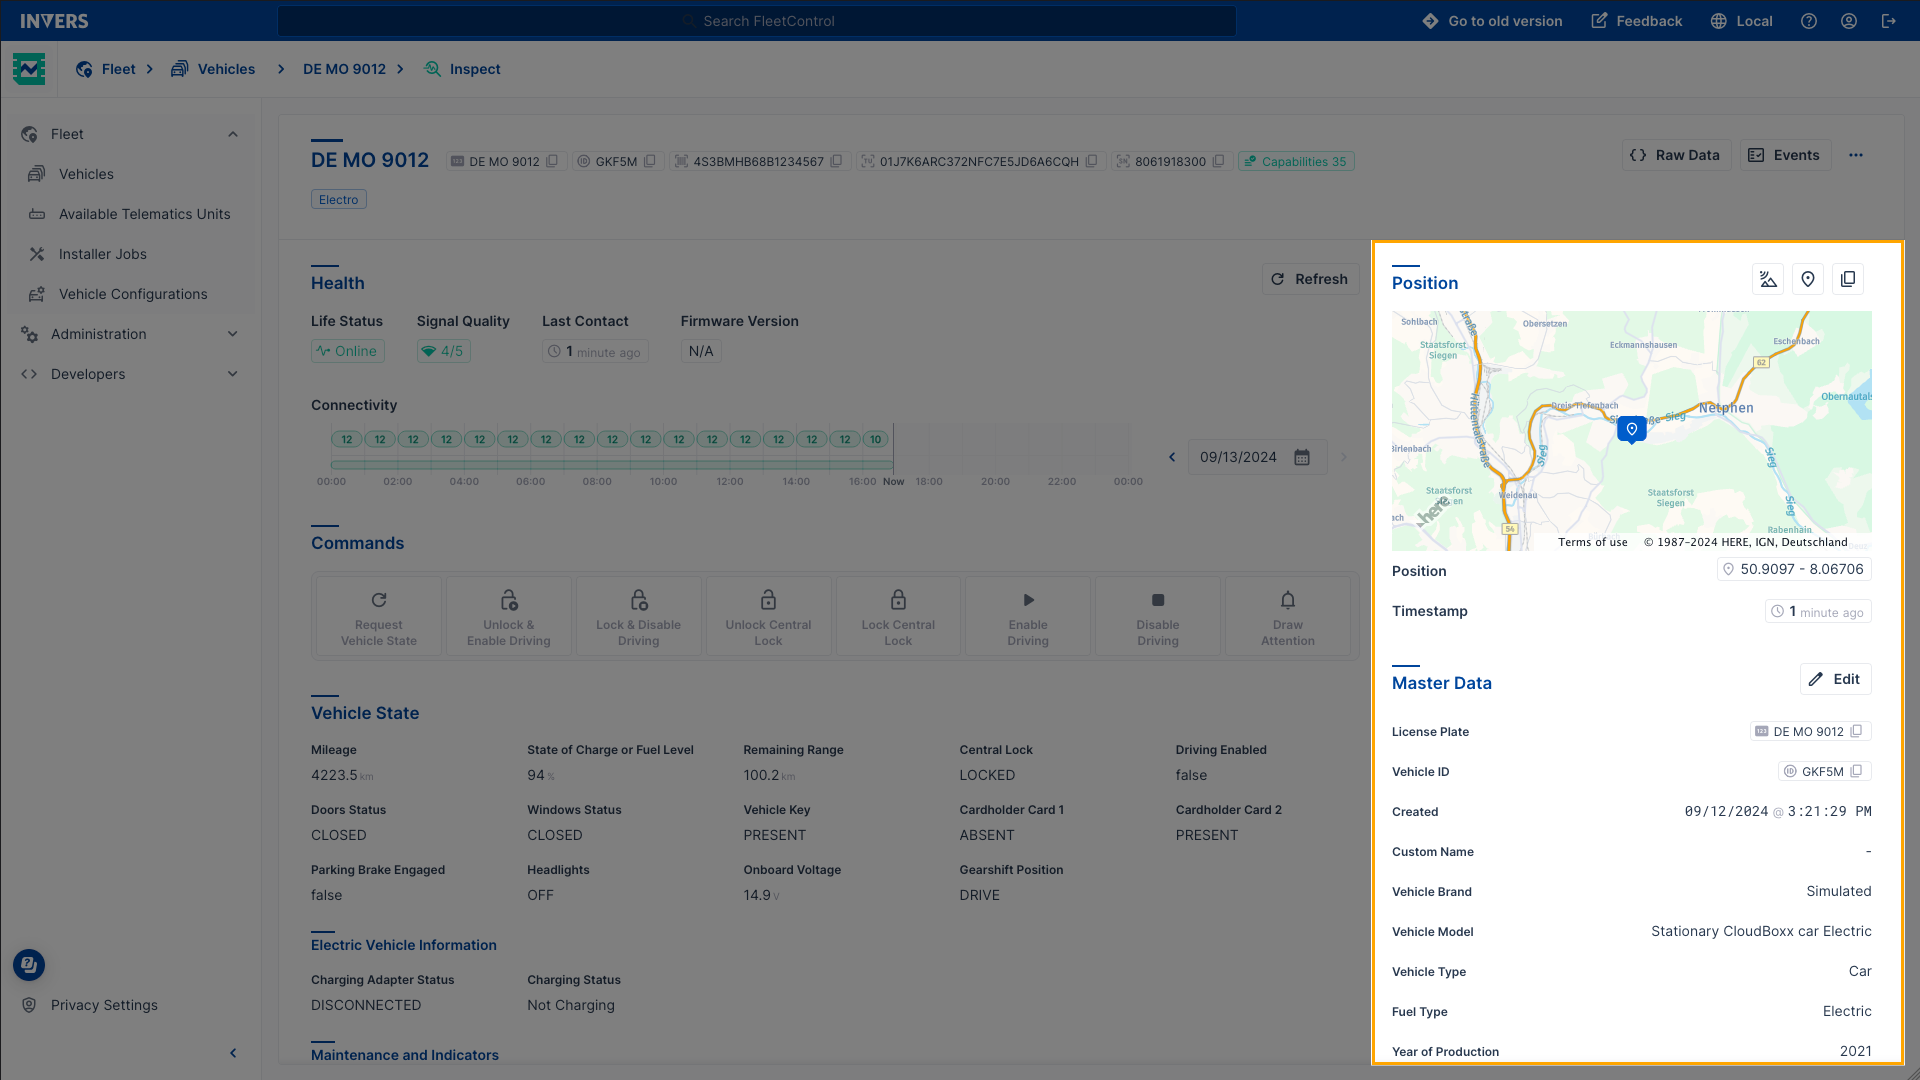
The side panel area contains different location lookup options, a minimap with the vehicle’s latest position, and the master data of the vehicle. Select Edit to add, remove, or change information about the vehicles’ master data.
The position options located above the scrollable and zoomable minimap are:
- Show GNSS Details: Open a window to see altitude, heading, speed over ground, and other position-related information.
- Open in Google Maps: Go to Google Maps with the exact coordinates of the vehicle.
- Copy Coordinates: Copy coordinates to the clipboard.